> ## Documentation Index
> Fetch the complete documentation index at: https://docs.novita.ai/llms.txt
> Use this file to discover all available pages before exploring further.
# Command Code
> Connect Command Code to Novita's OpenAI-compatible LLM API endpoint.
Command Code is an AI coding agent CLI that runs in your terminal. It supports Bring Your Own Key (BYOK) providers, so you can connect it to Novita's OpenAI-compatible LLM API endpoint and use Novita models for coding, debugging, refactoring, and project Q\&A.
BYOK in Command Code is in beta. Provider configuration may change; check [Command Code's BYOK docs](https://commandcode.ai/docs/byok) if a step below doesn't match what you see.
## Prerequisites
Before you begin, prepare the following values:
* **API key**: Create or copy an API key from [Key Management](https://novita.ai/settings/key-management).
* **Base URL**: `https://api.novita.ai/openai/v1`
* **Model ID**: Copy the model ID you want to use from the Model Hub, such as `deepseek/deepseek-v4.1-flash`.
Keep your API key private. Use it only in your local Command Code configuration and never commit it to a Git repository.
## Install Command Code
Command Code requires Node.js 22 or newer.
```bash theme={"system"}
node -v
```
Install Command Code globally with npm:
```bash theme={"system"}
npm i -g command-code@latest
```
Check the version:
```bash theme={"system"}
cmd --version
```
## Configure your API key
Open your shell configuration file, for example `~/.zshrc`:
```bash theme={"system"}
nano ~/.zshrc
```
Add the following environment variable:
```bash theme={"system"}
export NOVITA_API_KEY=""
```
Reload your shell configuration and confirm the variable is available:
```bash theme={"system"}
source ~/.zshrc
echo $NOVITA_API_KEY
```
## Add Novita as a BYOK provider
Command Code stores BYOK provider configuration in `~/.commandcode/providers.json`. Novita is already in Command Code's bundled provider registry, so you can connect it in a few steps through the interactive `/connect` menu, or add it by editing the file directly.
### Option 1: Interactive setup
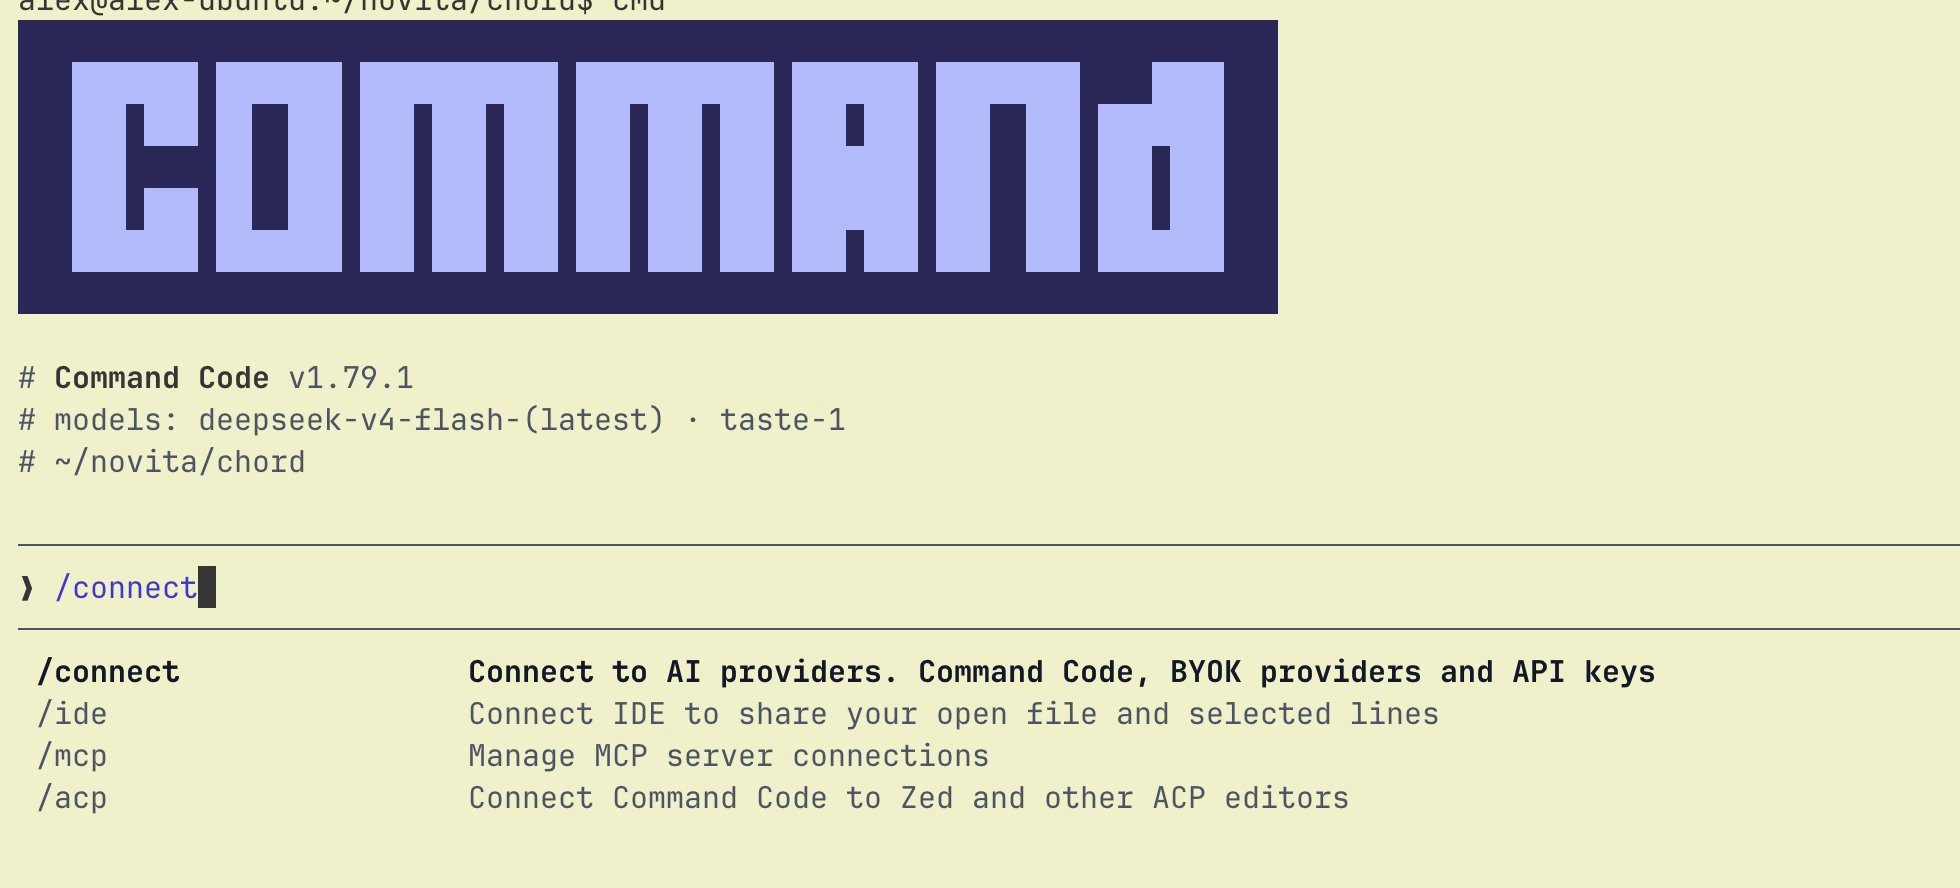
In a Command Code session, run:
```text theme={"system"}
/connect
```
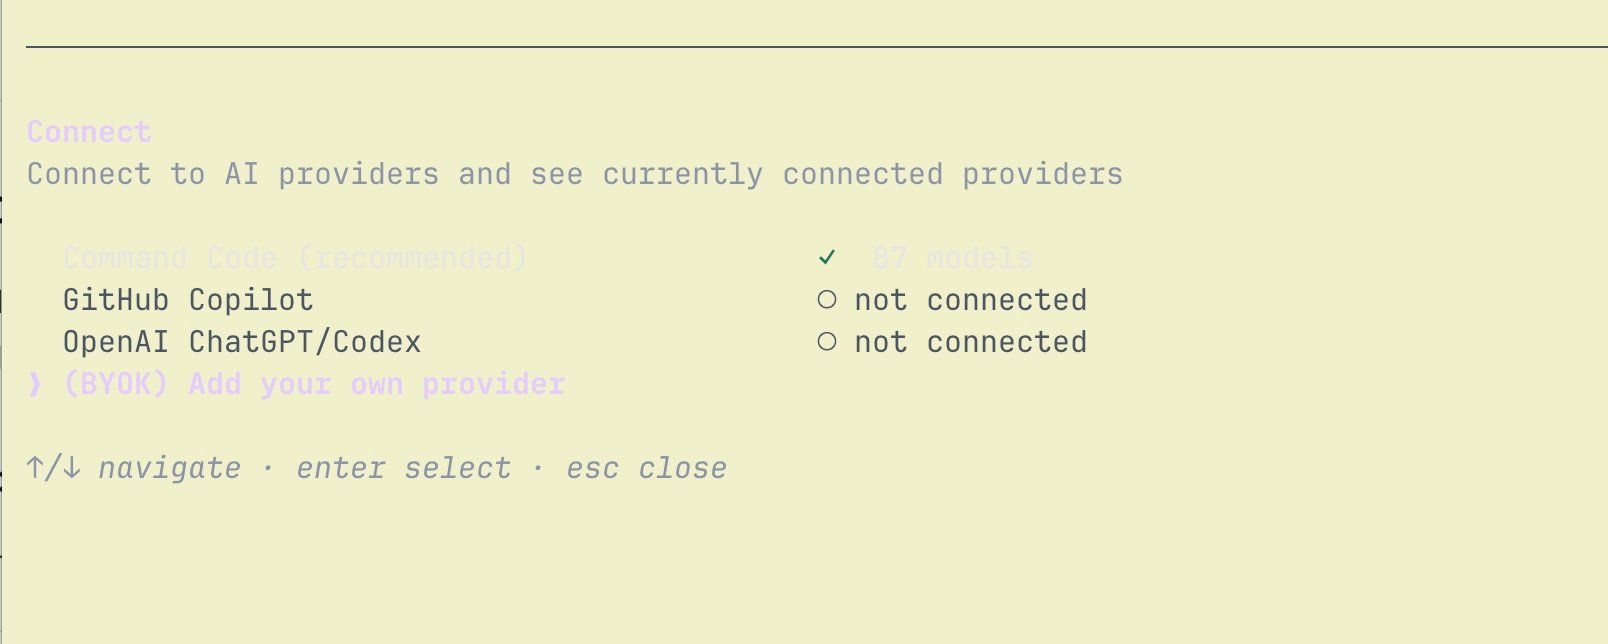
 Select **(BYOK) Add your own provider**:
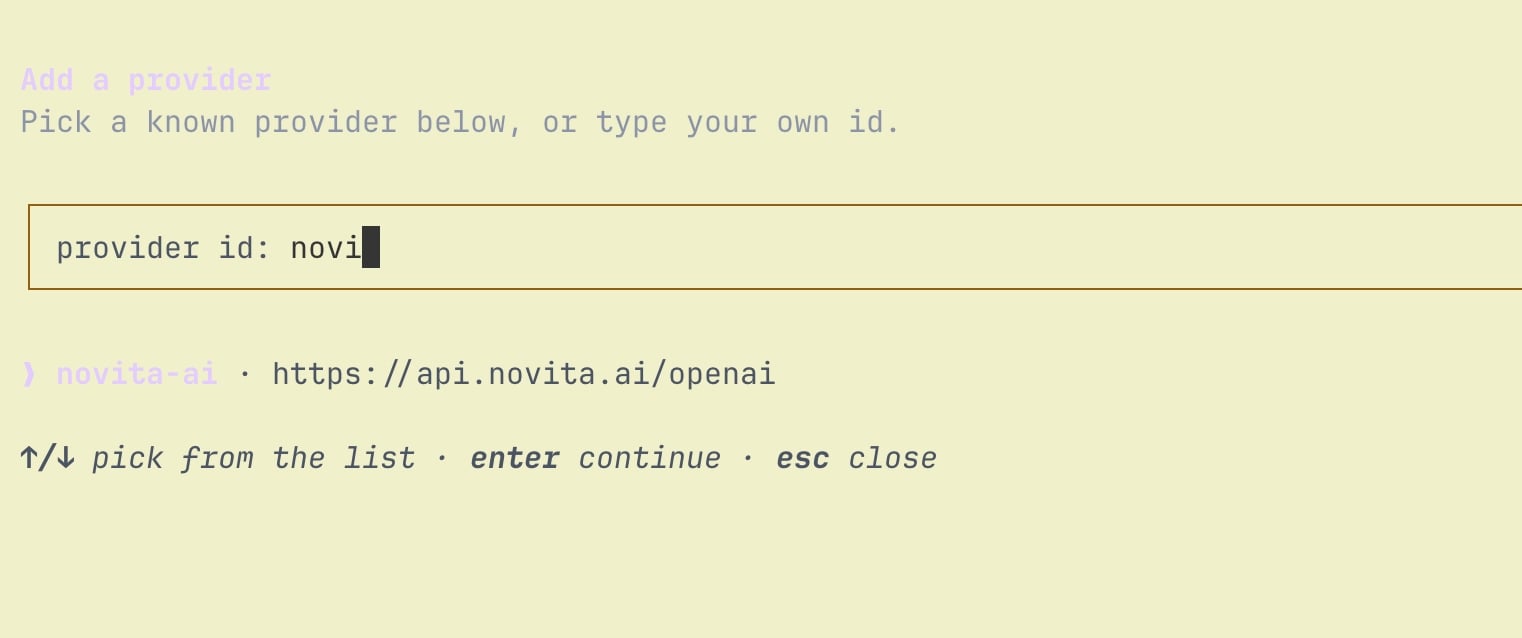
 Type `novita` to find the bundled `novita-ai` provider entry (base URL `https://api.novita.ai/openai`) and select it:
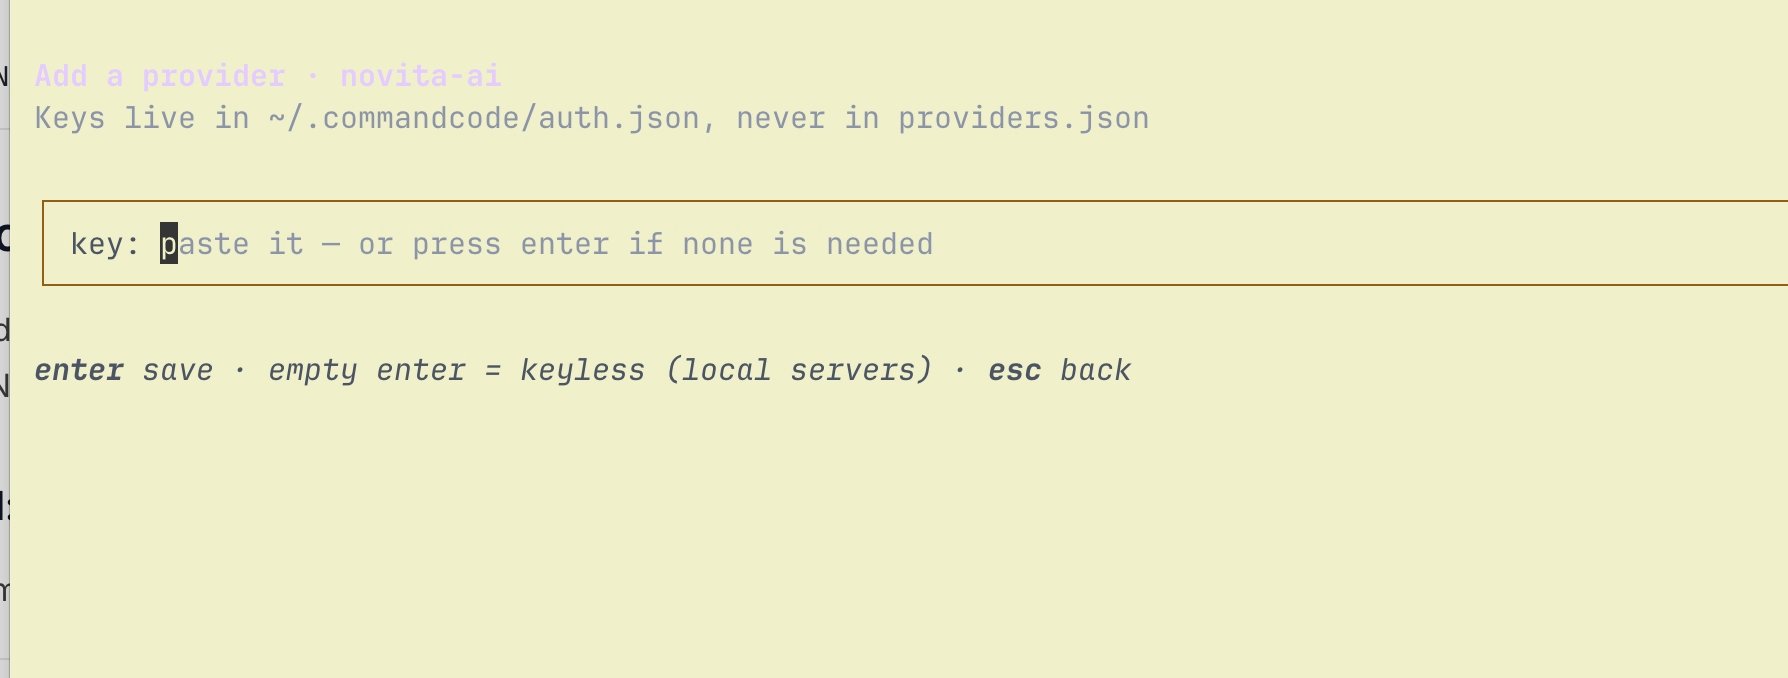
 Paste your Novita API key when prompted. Command Code stores it in `~/.commandcode/auth.json`, never in `providers.json`:
 Novita's models now appear under `/model`. Pick one and start coding.
### Option 2: Edit providers.json directly
Open `~/.commandcode/providers.json` and add a `novita` entry:
```json theme={"system"}
// ~/.commandcode/providers.json
{
"provider": {
"novita": {
"name": "Novita",
"baseURL": "https://api.novita.ai/openai/v1",
"apiKey": "$NOVITA_API_KEY",
"models": { "deepseek/deepseek-v4.1-flash": {} }
}
}
}
```
Novita's `/openai/v1` endpoint is OpenAI Chat Completions compatible, so you can omit the `api` field (it defaults to `openai-completions`). Add `contextWindow` per model if you want Command Code to show the correct context length instead of its 200K default; check the value for your model in the [Model Hub](https://novita.ai/models).
Changes to `providers.json` apply live. Reopen `/connect` or `/model` in Command Code to see the `novita` provider and its models.
## Start Command Code
Go to your project directory and start Command Code:
```bash theme={"system"}
cd
cmd
```
Open the model menu and select a Novita model:
```text theme={"system"}
/model
```
Send a test prompt:
```text theme={"system"}
In one sentence, tell me what programming tasks you can help with.
```
If the request fails, check that:
* `NOVITA_API_KEY` is available in the current terminal session, or the key is set directly in `providers.json`.
* The model ID exactly matches the Model ID in Novita's Model Hub.
* `baseURL` is set to `https://api.novita.ai/openai/v1`.
This documentation is built and hosted on [Mintlify](https://mintlify.com), a developer documentation platform.
Novita's models now appear under `/model`. Pick one and start coding.
### Option 2: Edit providers.json directly
Open `~/.commandcode/providers.json` and add a `novita` entry:
```json theme={"system"}
// ~/.commandcode/providers.json
{
"provider": {
"novita": {
"name": "Novita",
"baseURL": "https://api.novita.ai/openai/v1",
"apiKey": "$NOVITA_API_KEY",
"models": { "deepseek/deepseek-v4.1-flash": {} }
}
}
}
```
Novita's `/openai/v1` endpoint is OpenAI Chat Completions compatible, so you can omit the `api` field (it defaults to `openai-completions`). Add `contextWindow` per model if you want Command Code to show the correct context length instead of its 200K default; check the value for your model in the [Model Hub](https://novita.ai/models).
Changes to `providers.json` apply live. Reopen `/connect` or `/model` in Command Code to see the `novita` provider and its models.
## Start Command Code
Go to your project directory and start Command Code:
```bash theme={"system"}
cd
cmd
```
Open the model menu and select a Novita model:
```text theme={"system"}
/model
```
Send a test prompt:
```text theme={"system"}
In one sentence, tell me what programming tasks you can help with.
```
If the request fails, check that:
* `NOVITA_API_KEY` is available in the current terminal session, or the key is set directly in `providers.json`.
* The model ID exactly matches the Model ID in Novita's Model Hub.
* `baseURL` is set to `https://api.novita.ai/openai/v1`.
This documentation is built and hosted on [Mintlify](https://mintlify.com), a developer documentation platform.